DRO Scale Calibration
What is Linear Error Correction
In order to obtain the best accuracy from the DRO it is necessary to calibrate the scales after installation. Proper calibration will address two common issues:
First, many scales have a slight manufacturing error that can lead so inaccuracies. This is especially the case with the less expensive scales.
Second, even the most accurate scales can suffer for a sine error that is introduced when the scales are not mounted perfectly parallel to the axis of travel. For instance, a scale mounted at 0.1 degree off parallel will have an error of 0.020" over 12 inches of travel.
Linear error compensation is easily done in TouchDRO by changing the CPI (counts per inch) setting for each axis on the "Settings" page.
TouchDRO Calibration Procedure
Calibration procedure is relatively simple and consists of the following steps:
Step 1: Set TouchDRO to Display CPI
- Open the "Settings" page (in the top-right elipsis menu in TuochDRO)
- Change display format to display 4 digits after the decimal point
- Set axis CPI to 10000 for the desired axis
- Go back to the DRO screen
- Switch the axis display units to inches
Step 2: Move the Axis by a Known Distance
In order to capture accurate CPI, it is very important to move the scale a know distance as precisely as possible.
Using the Lead Screw
If you trust the accuracy of the lead screw on your particular machine, it can be used as the standard. The the procedure is as follows:
- Move the axis to one extreme of it's travel
- Move in the opposite direction to take up the backlash
- Zero-out the collar on the axis
- Zero-out TouchDRO
- Move the axis several inches or millimeters towards the other end of it's travel
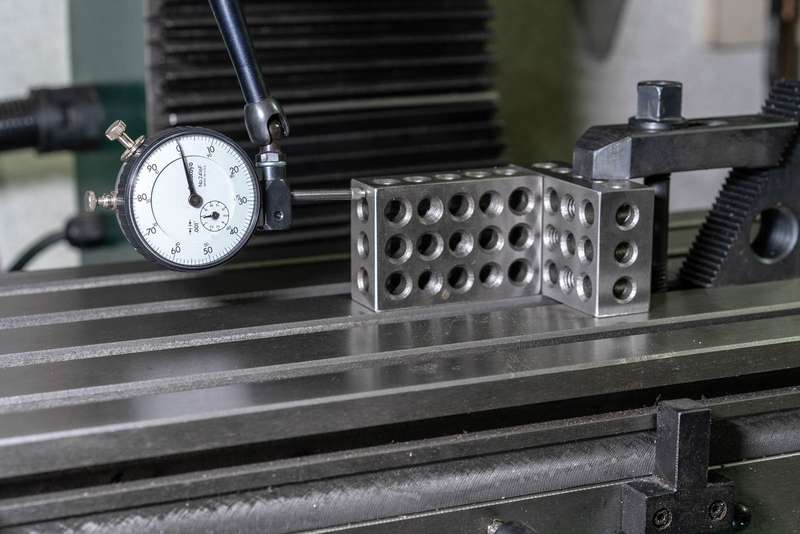
Using 1-2-3 Blocks
Using a set of 1-2-3 blocks (or another stable object of known size) is only slightly more involved but will likely yield better results in most cases. The procedure is as follows:

- Attach one of the blocks to the machine's table so one size is perpendicular to the axis of travel.
- Move the spindle away from the block
- Pleace the second block firmly against the firts block
- Insert a dial test indicator into the spindle
- Touch off second block and zero out the dial test indicator
- Remove second block and touch off the block that is attached to the table until the indicator reads 0
Step 3: Calculate Counts per Inch
At this point TouchDRO readout for the axis will display a number simlar to XX.XXXX. Ignoring the decimal point, this is the number of encoder pulses the scale registereed during this move. In other words, if the readout is 60.960, TouchDRO has registered 60960 pulses. To claculate the CPI, use one of the formulas below:
If Using Inches
Divide the reading (ignoring the decimal point) by the number of inches traveled. For instances, if the readout is 60.960, the CPI will be:
60960/12=5080
If Using Millimeters
Divide the reading (ignoring the decimal point) by the number of millimeters traveled; divide the result by 1/25.4.
For example, let's say you moved the axis 100mm and received a reading of 104.33. The CPI will be:
10433/100/(1/25.4)=2649.982
Step 4: Set Axis CPI
- Open the "Settings" page in TouchDRO
- Enter the CPI obtained in step 3 into the aixs CPI field
- If the number was negative, check the "Invert Axis" checkbox
- Exit "Settings" page to go back to the DRO screen
Step 5: Verify the Result
If the calibration procedure was done correctly, the DRO should now display exactly the distance you moved the axis in step 2. To verify:
- Move the axis to the middle of it's travel
- Move the axis in the positive direction to take up the backlash
- Set the collar to 0
- Zero-out the axis readout in TouchDRO
- Switch the axis to the desired units (inches or mm)
- Move the axis in the positive direction some known distance
- Verify that the readout display the correct positive number
If the reading is slighly off, either repeat steps 1-5 or try tweaking the CPI by a small number and repeating step 5. Please note, CPI can be a decimal number, therefore unless the lead screw has non-linear error, TouchDRO can be set to have 0 error.
