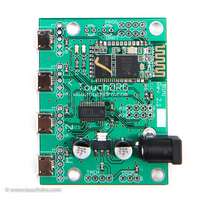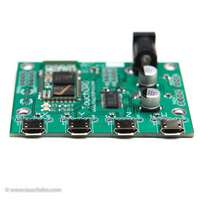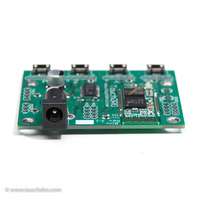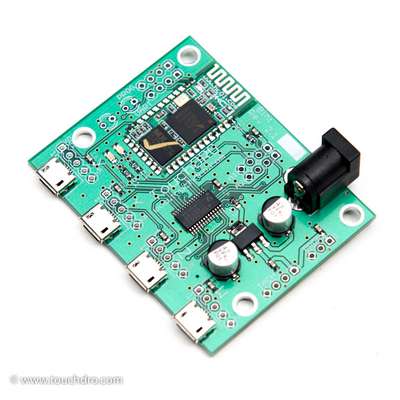
Wireless DRO Adapter for iGaging/Shahe Scales
This is updated version of the TouchDRO BlueTooth DRO controller for iGaging/Shahe scales (with pre-installed Micro-B USB connectors). It supports up to four linear scales, tachomter and touch probe/tool height setter.
Inlcluded: Assembled, programmed and tested controller with pre-installed Micro-B USB connectors (no soldering required)
You Provide: Scales, 5-12 V DC power supply, and enclosure
Description
Designed from the ground up to provide best performance and reliability, this is the most popular TouchDRO BlueTooth controller. It is compatible with the classic iGaging DigiMag Remote DRO, AccuRemote, iGaging Absolute DRO+,iGaging EZ-View, and other 21-bit scales. In addition to four linear scale inputs, the controller supports rotary axis, tachometer and touch probe/height setter input.
All genuine TouchDRO controllers are fabricated and assembled in the USA to stringent IPS-A-600/610 Class II or better standard and use quality name brand components for best reliability and durability. I personally inspect every board and run it through a full range of tests (scale connectivity, bluetooth, etc.) before shipping it to you.
Specifications
Features
| Scale Intputs | 4 |
|---|---|
| Angular Axis | No* |
| Tachometer Intput | Yes |
| Probe/Height Setter | Yes |
| Power Supply | 5V DC - 12V DC |
| Current Draw | Approx. 30 mA |
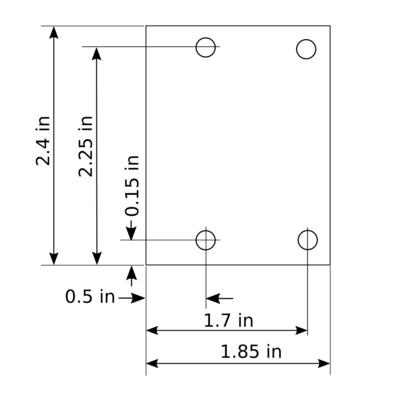
| Width | 1.85" |
| Letgth | 2.4" |
* Future firmware version will support up to two auxilary quadrature axis inputs.
Supported Scales
- iGaging DigiMag Remote DRO
- iGaging EZ-View
- iGaging AbsoluteDRO Plus
- AccuRemote Remote DRO
- Generic Shahe Remove DRO Scales*
* iGaging DigiMag scales are re-badged Shahe scales. Unbranded scales are offered by sellers and besides the lack of iGaigng logo are otherwise identical.
Mechanical Drawings
Documentation
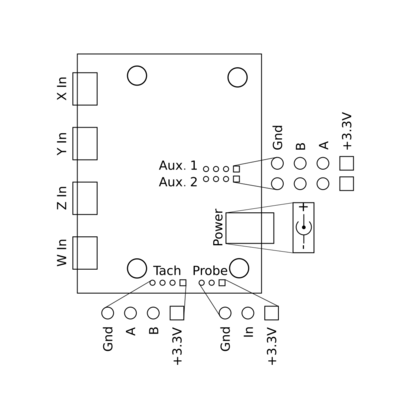
Port Functions
| Port | Description |
|---|---|
| X,Y,Z,W Inputs | Inputs for four linear axes. |
| Aux1, Aux2 | Auxilary inputs for future expansion. Future version of the firmware will support two quadrature encoder inputs (rotary or linear). |
| Tach | Directional tachometer input (unbuffered). Directional tachomter requires optical encoder with quadrature input. For single pulse input use only "A" line |
| Probe | Tool height setter/touch probe input. Firmware already supports this input; application funcationality will be available in version 2.6 (currently under active development). |
| Power | Power supply input. Requires DC power source between 5V and 12V DC. Most optimal voltage is around 6V. Higher voltage will result in more heat around the voltage regulator; lower voltage might cause brownouts. |
Status LEDs
DRO scale controller has two status LEDs:
- Greel - Heartbeat/status
- Blue - BlueTooth
When the board powers up, the green LED will blink rapidly for 2 seconds, indicating that the protocol detection is in progress. During protocol detection DRO will not read the position. After two seconds it will start blinking once-per-second, indicating normal operation.
Blue LED is used to indicate the connection status. It can be in one of three modes:
- When the board is not paired, the LED will blink twice per second.
- Once paired the blinking pattern will change to one brief pulse every 2 seconds.
- When the board is connected to the application, the LED will switch to two brief pulses every 2 seconds.
Connecting the Scales
- Disconnect the power supply
- Plug-in the scales
- Re-connect the power
It is important to power-cycle the board after connecting the scales or the touch probe so it can run the protocol detection routine.
Grounding
Proper grounding is vital to relaible funciton of iGaging DRO scales. Unreliable ground connection or ground loop can lead to such issues as drifting positon or random resets. In order to avoid ground loops, there should be a single reliable connection to the machine chassis. Ideally, scale frames should be isolated from the machine. If the cables are shielded, the shields should be tied to the ground only on one side, and as close to the central grounding point as possible.
The board provides a number of easily accessible grounding poins. Each port has a dedicate ground pint that is tied to the common ground pour. There are two ground pins next to each Micro-USB port and finally, the mounting holes are tied to the common ground as well.

